Creating a Bronze Sculpture
Creating a bronze sculpture requires collaboration between the sculptor and the skilled artisans of a casting foundry. The artist creates the original sculpture, and the foundry casts it in bronze. It is a multi-step, labor-intensive process that requires skill, technology, and industrial equipment.
Getting Started
All of my sculptures begin with a spark of inspiration. This can be from a photo or online image, or seeing the animal in real life. Once captivated, I first study images of the animal’s skeleton. This gives me an understanding of body proportions and the range of movement of the joints. In order to determine the pose the animal will take, I research the animal’s behavior: prey or predator, social or solitary, timid or aggressive. Finally, I make small quick sketches to establish the line of the pose and the overall form the sculpture will take. Only then am I ready to begin creating the “master” sculpture.

The Armature
The first step in creating the “master” sculpture is to build the armature, a structure that adds strength and enables the sculpture to be self supporting. Using aluminum or steel wire, I create a stick figure of the animal based on the skeleton studies. I twist and bend the wire stick figure into the pose. Next, I flesh out the body by attaching aluminum foil to the wire armature.

The Master
Traditionally, the original or “master” sculpture is made of modeling clay, which always stays soft. Wax, plaster, or wood can also be used. I prefer to sculpt with two-part epoxy clay, which self-hardens without heat. I first cover the wire and foil armature with a thin layer of epoxy clay. After this base layer of clay has hardened, I continue to add more clay to fill in the shape. The hardened form is further refined with rasps, files, and carving tools. The last step is to sand the master smooth with sand paper. I can complete a master in 2 to 6 weeks.

Mold Preparation
At the foundry, the first step in the casting process is to make a rubber mold of the master. First, a line that will divide the halves of the mold is drawn on the master. Care must be taken in plotting the line so that each part of the mold can be easily removed. Then the master is embedded in to a slab of modeling clay up to the parting line. Shallow holes are pressed into the clay to create alignment “keys” that will lock the halves of the mold together perfectly. Sometimes a casting will have several parts to the mold. Masters that have a more complex shape are first cut into pieces, and individual molds are made of each separate piece.

The Rubber Mold
Several coats of liquid rubber are painted on to the embedded master and the surrounding modeling clay. Each coat is allowed to dry before another is added. It can take several days to build up the mold to about ¼” thick. Before this half of the rubber mold is removed from the master, a plaster or fiberglass “mother mold” is applied over the rubber to give it rigidity.
The modeling clay is then removed, and the process repeated to create the other half of the mold. When the second side is complete, the mold is opened and the original sculpture is removed.
Once the mold is completed, it can be used to make wax duplicates of the master, which will become bronze castings. Most sculptors have their work cast in limited editions which means only a specified number of the sculpture will be made. This spreads the cost of the original sculpture and its rubber mold over several casts, saving money for the artist and the eventual purchaser. Each sculpture is marked with its number and the total edition number, such as “4 of 15". Once the specified number of sculptures has been cast, the rubber mold is destroyed so that no more copies can be produced.

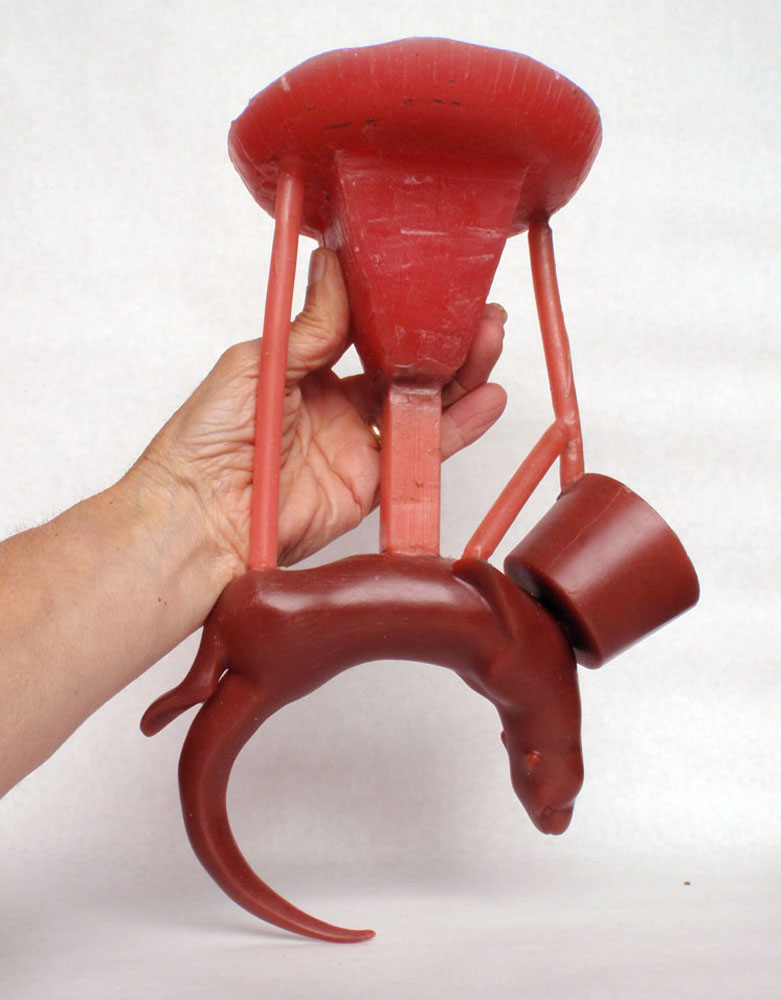
The Wax Positive
After the rubber mold is completed, wax is poured in to create a duplicate, or "positive," of the original sculpture. The mold is rotated so that hot wax coats the inside of the mold, a step that is repeated several times to achieve a desired thickness. The wax positive is now a hollow duplicate of the original sculpture. Once the wax has cooled, it is removed from the mold and touched up with fine tools to remove any defects and to recreate the fine detail of the original sculpture.
The Sprues
Now the wax positive is prepared for the bronze pouring process. The wax positive will become the internal shape of the next mold that will be used to accept the molten bronze. Wax rods, called “sprues,” are attached to the wax positive to create pathways for the bronze to flow and to allow air to escape as the molten bronze fills the mold. A large cup-shaped piece is added as the opening into which the bronze will be poured. Finally, bronze pins are inserted through the wax and into the hollow center. These pins will anchor the core that will form in the hollow space inside the wax positive.
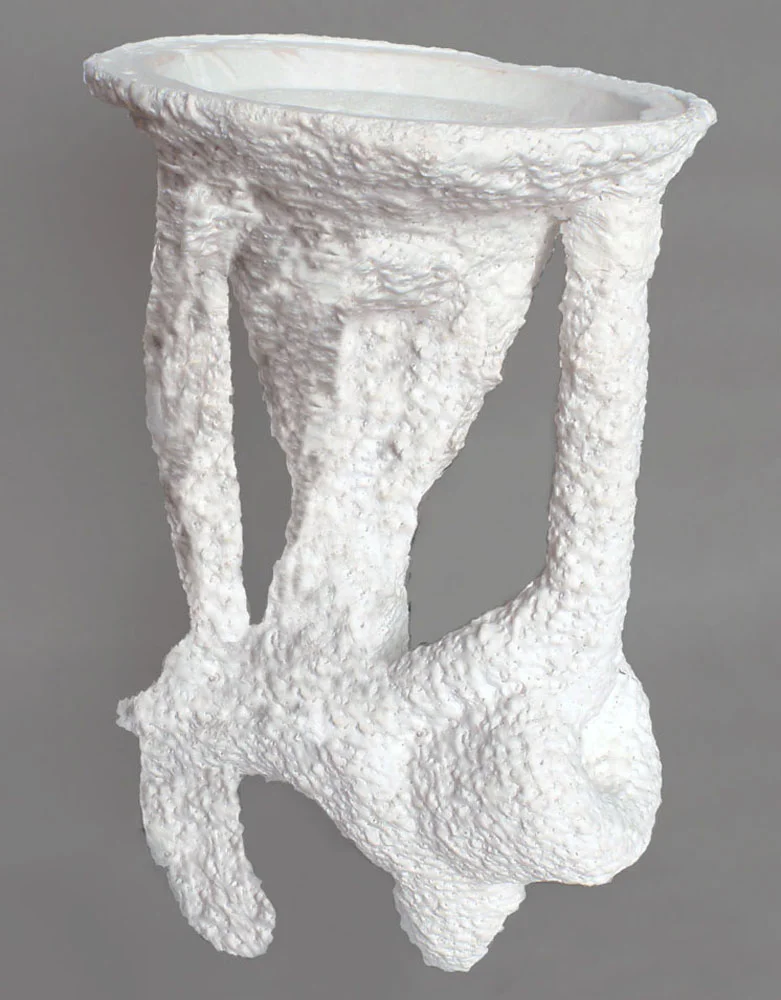
The Shell Mold
The wax positive of the sculpture is dipped multiple times into a vat of liquid silica (slurry), and then dusted with a sand-like crystalline silica. Each dipping is allowed to dry, and the process is repeated until a half-inch thick or thicker coating covers the piece, except for the top of the wax pour cup. The liquid slurry also flows into the hollow wax positive forming a core. The bronze pins that were inserted into the wax now anchor the core’s position inside the shell. After several days of drying, the entire shell is placed into a furnace, where the shell is hardened and the wax is melted out, creating a vessel with an interior negative space that is the shape of the wax positive and sprues.

The Pour
The empty shell is now a vessel into which molten bronze can be poured. Bronze ingots are placed in a metal crucible and melted in a gas furnace at 2000 degrees F. The glowing hot crucible is lifted from the furnace by a hoist, and the bronze is carefully poured into the preheated shell mold. The bronze is allowed to cool and harden. When cold, the shell and core are broken away from the bronze revealing the sculpture. The sprues and pour cup are cut off leaving a rough casting.

Bronze Chasing
The newly cast bronze is cleaned and refined with sandblasting, grinding, and polishing, a process called “chasing." Sculptures that are cast in several pieces are now welded together. The welds are ground down and the surface is finished to make the weld joints invisible. Metal chasing usually starts with large electric or pneumatic grinders used to remove most of the unwanted metal. Then, more refined and smaller tools are used to finish the surface texture, which can be rough or smooth, or even highly polished.

The Patina
Newly finished bronze has a golden color, similar to brass. Over time, it will naturally oxidize to a dark brown black color. To control the oxidation or to add other colors to the piece, the sculpture can be “patinated.” The patina process involves heating the casting with a gas torch and applying chemical solutions that react with the bronze and enhances its color. Different combinations create a wide variety of coloration. Last of all, a coating of wax is applied to preserve the finish. The piece that began as an idea in my head is finally a finished bronze sculpture. The casting process takes from six to eight weeks, or longer for complex or larger sculptures.